The Impact/Effort Matrix is a quick, visual way to prioritise a long list of ideas. The group places each idea on a 2×2 grid according to how much difference it would make and how much work it would take, and the answer to ‘What should we do first?’ starts to appear on the wall.
The grid itself is simple. What makes it an intermediate tool is running the placement fairly. You’ll need to help the group agree what impact and effort actually mean, push back gently when everything ends up as ‘high impact’ and make sure the loudest or most senior person in the room doesn’t decide where every note goes.
Method
Draw a large grid with Impact on the vertical axis and Effort on the horizontal axis, running from low to high. Each idea goes into one of four boxes:
- Quick wins (high impact, low effort): do these first.
- Major projects (high impact, high effort): worth doing, but they need planning and resources.
- Fill-ins (low impact, low effort): do them when there’s spare time, or not at all.
- Thankless tasks (low impact, high effort): usually best dropped.

Step 1: Gather the ideas
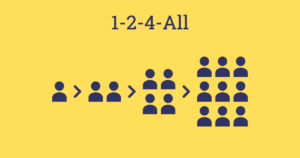
Collect the ideas, options or actions you want to prioritise, one per sticky note. You might already have them from an earlier activity, or you can generate them now with 1-2-4-All. Merge any duplicates and make sure each note is clear enough to be understood on its own.
Step 2: Agree what impact and effort mean
Before anything goes on the grid, agree what you’re measuring. Is impact about customers, money, staff wellbeing or the project’s goal? Does effort mean time, cost, people or all three? Write the definitions next to the grid. This takes five minutes and saves a lot of arguing later.
Step 3: Place the notes in silence
Ask people to place the notes on the grid without talking, using their own judgement. If someone disagrees with where a note has gone, they can move it, but if a note keeps moving back and forth, put it on the line and flag it for discussion. Working in silence first stops the first or loudest voice from setting the pattern.
Step 4: Discuss and adjust
Go through the grid box by box, starting with the notes that were flagged or that someone feels strongly about. Ask ‘What makes this high impact?’ or ‘What would it actually take?’, and move notes as the group’s understanding changes. If one box is overflowing, ask the group to rank the notes within it.
Step 5: Agree next steps
Agree what happens to each box: who’s taking on the quick wins and by when, which major projects need a plan, and what you’re going to stop or not start. Take a photo of the finished grid so the decisions aren’t lost.
Outcome
A prioritised set of ideas that everyone has had a say in, and a clear picture of what to do now, what to plan for and what to let go. Because the reasoning is visible on the wall, it’s easier to explain the decisions to people who weren’t in the room, and to come back to them later when things change.
Tips for Facilitators
- When everything is high impact: the grid only works if the notes spread out. Ask the group to place the notes relative to each other, so that only the top third can sit in the top half, or ask ‘If we could only do one of these, which would it be?’.
- Watch for hierarchy: if a senior person keeps moving notes, thank them and ask what others think before the note settles. You might ask senior people to place their notes last.
- Bring in the experts on effort: people tend to guess at effort. If the people who’d do the work aren’t in the room, mark effort as provisional and check it with them.
- Don’t ignore the major projects: quick wins are satisfying, but the big, high-impact ideas are often what really matter. Make sure at least one gets a next step.
Variations
- Dot-vote first: for a long list, use Dot Voting to pick the ten or so ideas the group cares about most, and only put those on the grid.
- Value and complexity: swap the axis labels to suit your group, for example value against cost, or benefit against risk. The four boxes work the same way.
- Rank within a box: once the grid is done, use Diamond Ranking to put the quick wins or major projects in order.
- Remote on a whiteboard: draw the grid on an online whiteboard, give everyone a few minutes to add and place notes, then discuss it together on a call.
Accessibility and Online Sessions
Draw the grid large and at a height that seated participants and wheelchair users can reach, or ask people to tell you where a note should go and place it for them. Use thick, dark pens and read the notes out as you go so everyone can follow, including anyone with a visual impairment. Some people find a busy crowd round a wall stressful, so let small groups take turns to place their notes.
Online, set up the grid on a shared whiteboard with sticky notes ready to drag, and give a short demo first for anyone new to the tool. Keep the silent placement round, with cameras optional, then talk the grid through box by box. Export or screenshot the finished grid and share it straight after the session.