A SWOT analysis is a simple way to take an honest look at where you are before you decide where to go next. You map out your Strengths, Weaknesses, Opportunities and Threats on a 2×2 grid, then use what you find to make better plans. It works for a whole organisation, a team, a project, an event or even your own career.
You can run it as a group activity, where it’s a great way to bring different perspectives together, or work through it on your own. The grid itself is easy to understand. What makes it an intermediate tool is keeping it specific and honest, making sure each point goes in the right box, and turning four lists into actions rather than leaving them on a flipchart.
Method
Agree what you’re analysing, fill in the four boxes, check and prioritise what’s there, then use the grid to decide what to do next.
Step 1: Agree the focus
Decide exactly what you’re analysing and write it at the top of the sheet. The more specific, the better. “Our youth club’s summer programme” will give you far more useful answers than “the organisation”. If you’re making a decision, such as whether to launch a new service, put that at the top instead.
Step 2: Draw the grid and explain it
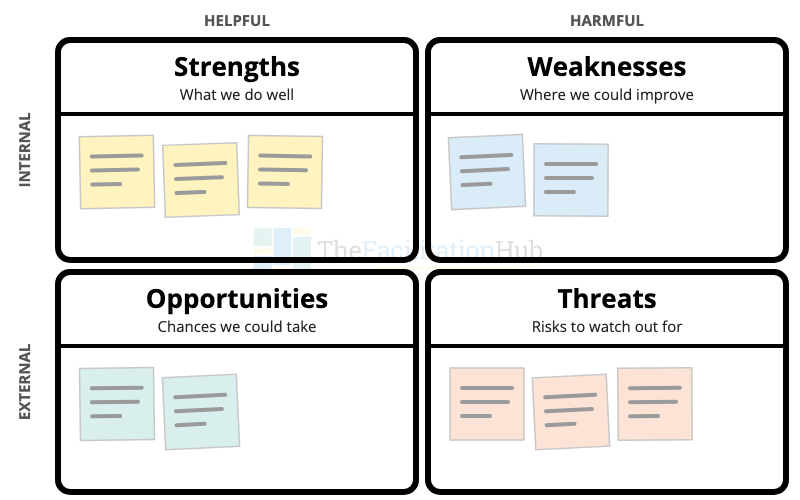
Draw a large 2×2 grid on flipchart paper or a whiteboard and label the four boxes. Take a moment to explain the difference between the top and bottom rows, because it’s the part people most often get wrong:
“The top row is about us: our strengths and our weaknesses. These are things we have some control over. The bottom row is about the world around us: opportunities we could make the most of and threats that could cause us problems. We can’t control those, but we can plan for them.”
Step 3: Fill in the boxes
Give everyone sticky notes and a few minutes of quiet time to write their own ideas, one per note, before anyone shares. Writing first means everyone’s view gets onto the wall, not just the loudest or most senior people’s. Use these prompts to get people started:
Strengths
“What do we do well? What do other people say we’re good at? What skills, resources or connections do we have that others don’t?”
Weaknesses
“Where do we struggle? What do people complain about? What are we missing, or what do we keep putting off?”
Opportunities
“What’s changing around us that could help? Who could we work with? Are there trends, funding, events or gaps that we could make the most of?”
Threats
“What could get in our way? What are others doing that could affect us? What changes are coming that could cause us problems?”
Then invite people to read their notes aloud as they stick them in the right box. With a large group, split into four smaller groups, give each one a box to start with, and rotate the flipcharts so every group adds to every box.
Step 4: Check and sort
Group similar notes together and look at what’s in each box. Three checks make a big difference:
- Is it in the right box? “A new community grant has opened” isn’t a strength; it’s an opportunity, because it comes from outside. “We have a great bid writer” is the strength that helps you take it.
- Is it specific? “Good communication” doesn’t tell you much. “Volunteers always know what’s happening because of our weekly email” does.
- Is it balanced? If one box is overflowing and another is empty, ask the group why. Some groups are too modest about their strengths; others don’t like to admit their weaknesses.
Step 5: Prioritise
Not every point matters equally. Give everyone a few dot stickers and ask them to vote for the most important points in each box, using dot voting. Circle the top two or three in each box.
Step 6: Turn the grid into actions
A SWOT grid on its own is just four lists. The real value comes from connecting the boxes. Look at your top points and ask four questions, an approach sometimes called a TOWS analysis:
“How can we use our strengths to make the most of these opportunities?”
“How can we use our strengths to protect ourselves from these threats?”
“Which weaknesses do we need to fix to take these opportunities?”
“Where do our weaknesses leave us exposed to these threats, and what can we do about it?”
Write down the actions that come out of this discussion, with a name and a deadline next to each one. A quick Decisions and Actions Review at the end makes sure nothing gets lost.
Example
Here’s what a finished SWOT analysis might look like for a community choir planning its next year:
Strengths
- Loyal, friendly members who bring their friends
- A talented volunteer musical director
- Free use of the church hall for rehearsals
Weaknesses
- Very few members under 40
- No one wants to be treasurer
- Concerts are only promoted by word of mouth
Opportunities
- A local arts festival is looking for performers
- A small grants scheme for community groups has just opened
- The local primary school wants to start a children’s choir
Threats
- The church hall may be sold next year
- A new choir has started in the next town
- Rising printing and venue costs
Connecting the boxes, the choir might decide to perform at the festival with the school’s children’s choir, using the musical director’s skills to attract younger families, and to apply for the grant to pay for social media promotion. They might also start looking for a backup rehearsal space now, before the hall is sold.
Doing a SWOT analysis on your own
A personal SWOT analysis is a useful way to think about your career, a freelance business or your development as a facilitator. The steps are the same, but a few things help when you’re working alone:
- Use evidence: look at feedback forms, appraisals and comments from colleagues or clients, rather than relying only on how you feel.
- Ask someone you trust: share your grid with a colleague or mentor. Other people often spot strengths we take for granted.
- Be kind but honest: a personal SWOT is for planning, not for criticising yourself.
- Revisit it: keep your grid and look at it again in six months to see what’s changed. It fits well alongside reflective practice.
Outcome
The group, or you on your own, ends up with a shared, honest picture of the current situation and a short list of actions that build on strengths, tackle weaknesses, make the most of opportunities and prepare for threats. Because everyone has contributed, the plan that follows is far more likely to have people’s support.
Tips for Facilitators
- Write first, talk second: silent writing before discussion stops the first few comments from shaping everyone else’s ideas.
- Bring in different views: if you can, include people who see the work from different angles, such as frontline staff, volunteers, service users and partners.
- Use four colours: giving each box its own colour of sticky note makes it obvious when a note is in the wrong place.
- Keep weaknesses safe to name: remind the group that you’re looking at the work, not judging individuals. Anonymous notes can help.
- Don’t stop at the grid: leave at least a third of your time for Step 6. A beautifully filled-in grid with no actions is the most common way a SWOT analysis goes wrong.
- Photograph everything: take a photo of the finished grid before anyone takes it down, and share it with the group along with the actions.
Variations
- Carousel SWOT: put each box on a separate flipchart in a different corner of the room. Small groups rotate between them every few minutes, adding to what the previous group wrote.
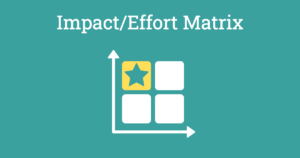
- Prioritise the actions: once you have a list of actions, place them on an Impact/Effort Matrix to decide what to do first.
- Dig deeper into threats: run a Pre-Mortem to explore what could go wrong in more detail.
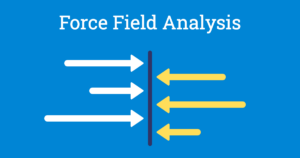
- Weigh up a single decision: if you’re deciding whether to make one particular change, Force Field Analysis can work alongside a SWOT analysis to show the forces for and against it.
Accessibility and Online Sessions
Put the grid at a height everyone can reach, including wheelchair users, or lay it flat on a table. Use thick markers and large, clear handwriting, and read each note aloud as it goes on the wall so people with visual impairments, or anyone at the back, can follow. Offer to write notes for anyone who would prefer not to, and give people the option of handing in anonymous notes.
Online, set up a digital whiteboard such as Miro with four labelled areas and a pile of sticky notes in each colour. Give people quiet time to add notes, then talk through each box together. For larger groups, use breakout rooms and give each room one or two boxes to start with.