An empathy map helps a team step into the shoes of the people it is designing for. On a large sheet divided into sections, the group captures what a person says, thinks, does and feels, based on what it knows from research. The result is a shared picture of someone’s experience that the whole team can see and build on.
The empathy map was created by Dave Gray at the visual thinking consultancy XPLANE and became widely known through the book Gamestorming, which he wrote with Sunni Brown and James Macanufo. It is now one of the most common tools in service design and user experience work. The simple four-part version described here is quick to learn, and it works for anyone you serve: customers, patients, tenants, pupils, volunteers or colleagues.
Empathy mapping is most useful early in a project, after some research but before the team jumps to solutions. It helps people spot gaps in what they know, notice where what people say differs from what they do, and agree who they are really designing for.
Method
Choose a person, draw the map, fill each section from the evidence, look for tensions and gaps, then sum up what the person needs.
Step 1: Choose who you are mapping
Agree a specific person or group to map, such as “a tenant moving into social housing for the first time” or “a carer booking appointments for a parent”. Give them a name and a short description, or use a persona if you have one. If you serve very different groups, make a separate map for each.
Step 2: Draw the map
On a large sheet, draw a simple outline of a head in the middle and divide the space around it into four sections:
- Says: what they say out loud, ideally in their own words from interviews.
- Thinks: what is going through their mind, including worries and hopes they might not say.
- Does: what they actually do, such as the steps they take, the workarounds they use and the people they ask for help.
- Feels: their emotions, such as anxious, relieved, confused or proud.
Add a strip along the bottom for pains, meaning what frustrates or worries them, and gains, meaning what they want and what success would look like for them.
Step 3: Share the evidence
Spend ten minutes reviewing what you know from research: interview notes, quotes, observations or feedback. Ask each person to write one point per sticky note as they go.
Step 4: Fill in the map
Working in small groups, place the notes in the right sections. Use one colour for things you know from research and another for assumptions, so it’s clear which is which. Encourage people to use the person’s own words wherever they can.
Step 5: Look for tensions and gaps
Step back and read the map together. Where does what people say differ from what they do? Which sections are full, and which are almost empty? Gaps show where the team needs more research, and tensions often point to the most interesting design problems.
Step 6: Sum up the needs
Finish by writing two or three statements that start “This person needs a way to…” and agreeing which ones to focus on. These make a strong starting point for generating ideas or mapping the person’s whole journey.
Outcome
The team shares a clear, evidence-based picture of the person it is designing for, including their feelings and frustrations as well as their actions. Gaps in knowledge are visible, assumptions are labelled, and the group leaves with a small set of needs to guide the next stage of work.
Tips for Facilitators
- Base it on real people: an empathy map built only on guesses can reinforce stereotypes. Bring quotes, recordings or photos from research into the room.
- Label assumptions: use a different colour for anything the team believes but has not checked, and turn those notes into research questions.
- Be specific: “Feels anxious about missing the deadline” is more useful than “stressed”.
- Involve people with lived experience: where you can, invite people who use the service to help create the map, not just staff.
- Keep it visible: put the finished map on the wall for the rest of the project, so it can be updated as you learn more.
Variations
- Before and after: map how a person feels before using a service and after, to see what difference the service makes.
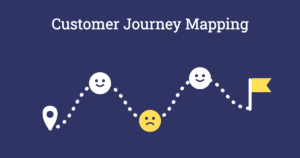
- Into the journey: use the map as a starting point for Customer Journey Mapping, which follows the same person step by step.
- Picture it: use photos taken by service users, as in Photovoice, to fill the map with real moments from people’s lives.
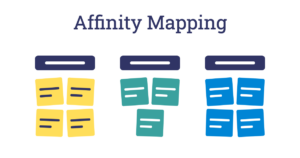
- Sort the research first: if you have a lot of interview notes, group them into themes with Affinity Mapping before you build the map.
- Quick version: for a short session, ask each person to sketch a map on a single sheet of A4 in ten minutes, then compare them in pairs.
Accessibility and Online Sessions
Print the map large, with clear headings and plenty of space, and read notes aloud as they go up so everyone can follow. Let people dictate their ideas to a partner if writing is hard for them. Take care with personal stories from research, and remove names and details that could identify anyone. Online, use a digital whiteboard with an empathy map template, give each group its own copy, and allow a few minutes of quiet writing time before discussion, so people who need longer to think can contribute fully.