Photovoice puts cameras in the hands of the people who know a place best. Participants spend a week or two photographing their community, guided by a few simple prompts, then come back together to share their pictures and talk about what they show. The photos become the starting point for honest conversations about what people value, what frustrates them and what they would change.
Caroline Wang and Mary Ann Burris developed Photovoice in the 1990s as a way for communities to record their own lives and reach the people who make decisions about them. It works well in service design, community development and neighbourhood planning, and with groups whose voices are often missing from consultations, such as young people, older residents, disabled people and people who don’t speak English as a first language. A photo can say things a survey never will.
The secret ingredient is a limit. Give each person a set number of shots, such as 8, 12 or 16, and they stop snapping everything they see and start thinking about what really matters. You’ll also end up with a manageable set of photos to work with, rather than hundreds.
Method
Agree the purpose and the prompts, brief the group and give out the cameras, and give people time to take their photos. Then bring everyone back together to choose, caption and discuss their pictures, and agree what they want to say to decision-makers.
Step 1: Agree the purpose and prompts
Be clear about what the project is for and who will see the results, for example a council team redesigning a park, a housing association planning improvements or a library reviewing its services. Then choose two to four prompts. Good prompts are open and personal, and invite people to show what matters to them, not just what’s broken. For example:
- Something in your community you find beautiful: a front garden that brightens the whole street, the bench outside the shop where people stop for a chat, the view from the top of the hill on the walk to school.
- Something you find ugly or unwelcoming: a bus stop with no shelter or seat, a boarded-up community centre, an underpass people avoid after dark, a pavement too narrow for a wheelchair or a pushchair.
- Something you’d like to change: a park with nothing for teenagers to do, a crossing that changes too quickly for older people, a playing field with no path to reach it, a high street with nowhere to sit.
- Something that makes you feel you belong: the place where you meet your friends, a mural that tells the story of the area, the corner shop where they know your name.
Encourage people to look beyond the obvious. Litter, graffiti and fly-tipping matter, but the most useful photos often show something subtler: the lack of anywhere to go, a route that never feels safe or a place that quietly holds the community together.
Step 2: Choose your cameras
There are two good ways to limit the number of photos each person can take:
- Disposable cameras: each person gets a single-use film camera. There is no screen to check and no delete button, so every shot counts, and people tend to enjoy the novelty. Allow time and budget for developing the film, and decide whether you will collect the cameras or ask people to drop them off.
- A limited-shot camera on their phone: people scan a QR code that opens a web-based camera with a set number of shots, like a disposable camera app. The photos go straight to a shared album you control, so there’s nothing to develop. We have used POV for this in the past: you choose how many photos each person can take, and people join by scanning a QR code, with no app to download. Check that the service stores photos securely and doesn’t make people create an account.
If you’re using phones, offer a disposable camera or a borrowed device to anyone who doesn’t have a smartphone or would rather not use their own.
Step 3: Brief the group
Run a short first session to explain the purpose and the prompts, look at a few example photos together and talk about taking photos safely and respectfully. Agree the rules on photographing people: ask before taking anyone’s photo, never photograph children without a parent’s permission, and focus on places and objects where possible. Collect consent forms that explain how the photos will be used, shared and stored.
Step 4: Take the photos
Give people one or two weeks, so they can capture different times of day and different parts of their routine. Send a reminder of the prompts halfway through, and suggest roughly how many shots to save for each one, such as three or four.
Step 5: Choose and caption
Bring the group back together with the photos printed out. Ask each person to choose the two or three photos that say the most, and to write a short caption for each one in their own words. The explanation matters as much as the picture: a photo of an empty bench might be about loneliness, about safety or about a favourite place to sit.
Step 6: Discuss the photos
Invite people to share their chosen photos in small groups. A set of questions known as SHOWeD, widely used in Photovoice, helps the conversation go beneath the surface:
- What do you See here?
- What’s really Happening here?
- How does this relate to Our lives?
- Why does this situation exist?
- What can we Do about it?
Step 7: Find the themes
Lay all the chosen photos and captions out on a wall or table, and ask the group to cluster them into themes, such as ‘nowhere for young people to go’ or ‘green spaces we’re proud of’. Name each theme together, then use dot voting to agree which themes matter most.
Step 8: Share what you found
Agree with the group how to share their findings, for example an exhibition in the local library, a presentation to councillors or a short report of photos and captions. Invite decision-makers to come and listen, and let participants present their own photos if they want to. Afterwards, tell the group what happened as a result.
Outcome
Decision-makers see the community through residents’ eyes, with evidence that’s personal, specific and hard to ignore. Participants gain confidence in sharing their views, and the conversation moves on from complaints to what people value and what they would change. With participants’ permission, the photos and captions also make powerful material for reports, consultations and funding bids.
Tips for Facilitators
- Keep the limit low: 8 to 16 shots per person is plenty. A tight limit makes people think, and leaves you with a number of photos the group can actually discuss.
- Plan for consent and safeguarding: agree how you will handle photos of people, especially children, and what you will do if someone photographs something that worries you. Treat the photos as personal data under UK GDPR, and agree how long you will keep them.
- Let people own their photos: ask permission before using any image, credit the photographer if they would like, and give everyone copies of their own pictures.
- Don’t judge the pictures: a blurry photo with a strong story is worth more than a perfect shot. This is about what people see, not how good they are at photography.
- Close the loop: people give you their time and trust. Tell them what decision-makers said and what has changed, even if the answer is ‘not yet’.
- Budget realistically: cameras, developing and printing all cost money, and so do refreshments and travel. Thank people for their time, for example with a voucher.
Variations
- Photo walk: for a shorter version, take the group on a one or two hour walk around the area, with each person limited to a handful of shots, then discuss the photos straight afterwards.
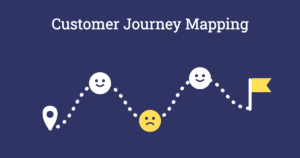
- Service journey: ask people to photograph their journey through a service, such as getting to a GP appointment or visiting the job centre, to show the moments that work and the ones that don’t. Pair it with World’s Worst [X] to explore what makes a bad experience.
- Then and now: invite older residents to bring old photos of the area and younger people to photograph the same places today, to start a conversation between generations.
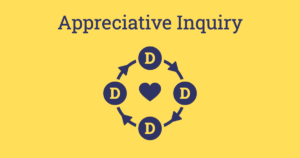
- Strengths first: keep every prompt about what people value, and use the photos as the starting point for an Appreciative Inquiry.
Accessibility and Online Sessions
Disposable cameras have small viewfinders and stiff winding wheels, which some people find difficult, so offer a phone-based option too. People who can’t easily get out and about can photograph what they see from home or on journeys they already make, or pair up with a buddy. Captions can be spoken and written down by someone else, and you can offer interpreters for the discussions.
Online, people can upload their photos to a shared album and talk about them on a video call, with the photos on screen or on a digital whiteboard where the group can cluster them into themes. Give people time to discuss their photos in breakout rooms of three or four before sharing with everyone.